Please sign my guestbook!
Sign My Guestbook  View My Guestbook
***DISCLAIMER***
(it's so pathetic that I have to do this; I HATE people that can't take responsibility for their own actions!)
This is ONLY documentation for my own project car. Should anyone decide to copy, emulate, or in any other way reproduce my ideas and/or methods, I bear NO RESPONSIBILITY for your actions. This is not a snap-tite model. There are no (quality) pre-fab kits out there that make it an easy 1-2-3 to do this conversion. This is custom work, and as such, is every bit as much art as it is science. Please ALWAYS think through what you're going to do before taking action, and PLEASE, Safety First!
Day 2 - New part weights, Headlight brackets & CF Hood installed... Fenders: worse than we thought
I decided that an accurate assesment of how much weight I would be saving (I'm assuming a significant amount) should be made of the new parts before I installed them, the results are as follows:
- S15 Headlights 6lbs. x2
- S15 OEM Bumper (urethane only) 9.6lbs
- IC S13-S15 Fenders 4lbs x2
- PS13 Headlight Brackets .25lbs x2
- VIS S15 OEM-Style Hood 24lbs
- S15 Hood Hinges 1.4lbs x2
- random hardware .1lb
Total weight of new parts: 47 pounds
Tomorrow I'll weight all of the old parts to calculate the total weight savings.
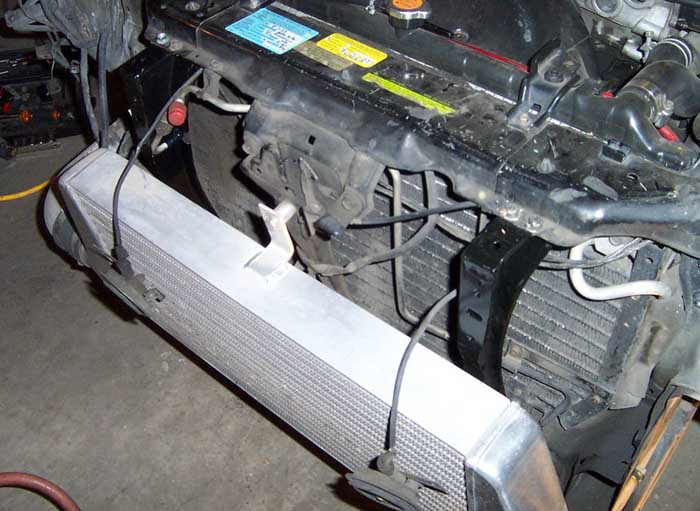
Here are the installed PS13 headlight brackets. Straight bolt-on, just like a normal Silvia conversion. When the holes are cut in the radiator core support, the lights will be mounted to these brackets with custom holes. (NOTE: Day 3 results show that the brackets are not QUITE bolt-on...)
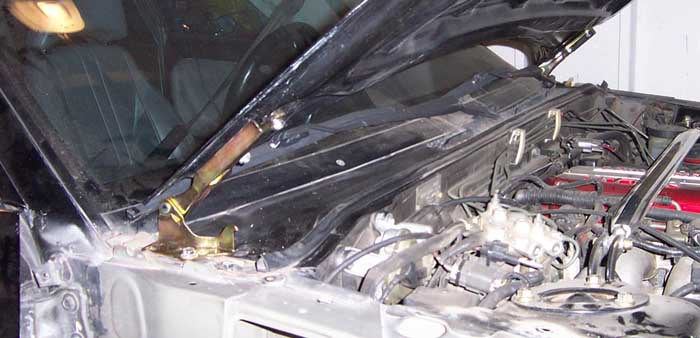
Here are the installed hood hinges and CF hood. If you use the S13 brackets, you have to move the brackets outward, which would require a tap/die set (which I don't have), also making it difficult to use the S13 hinges is that where you would need to drill is right where a seam is. I felt pretty uncomfortable attempting that, so I opted to use the OEM S15 hood hinges. If you match up the rear mounting hole on the chassis, with the front mounting hole of the bracket, the hood lines up (front to rear at least) like buttah. Of course using only one bolt mount is not as strong as both, but with the hood pins and factory latch, i'm confident that this will be of sufficient strength. Sam Chang tells me that this is the same setup the Jspec cars have been using on the track for some time now.
Additionally, Drift Freaq tells me that S14 hinges will be a straight bolt-on, utilizing all 4 mounting points, but I've not tested this... yet.
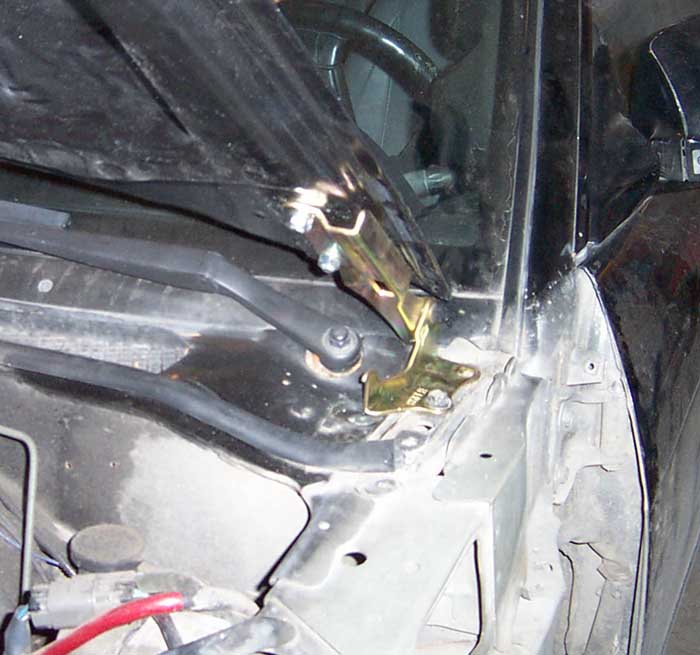
Here is a close-up on the hinge. You can clearly see the unused front mount and bolted front hinge mount, as well as the unbolted rear hinge mount.
Now the bad news, in 2 different ways, individual to each fender.
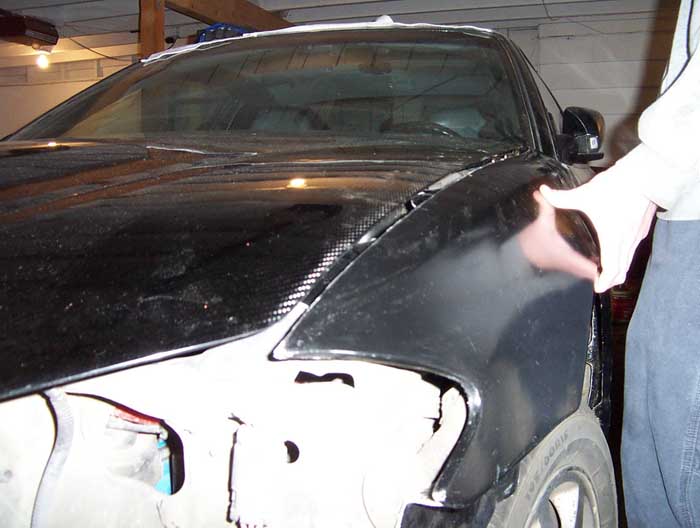
The driver's side fender is the worse of the 2, the gap between the fender and the hood is fairly extreme... about 3/4", even after much shoving and manipulating.
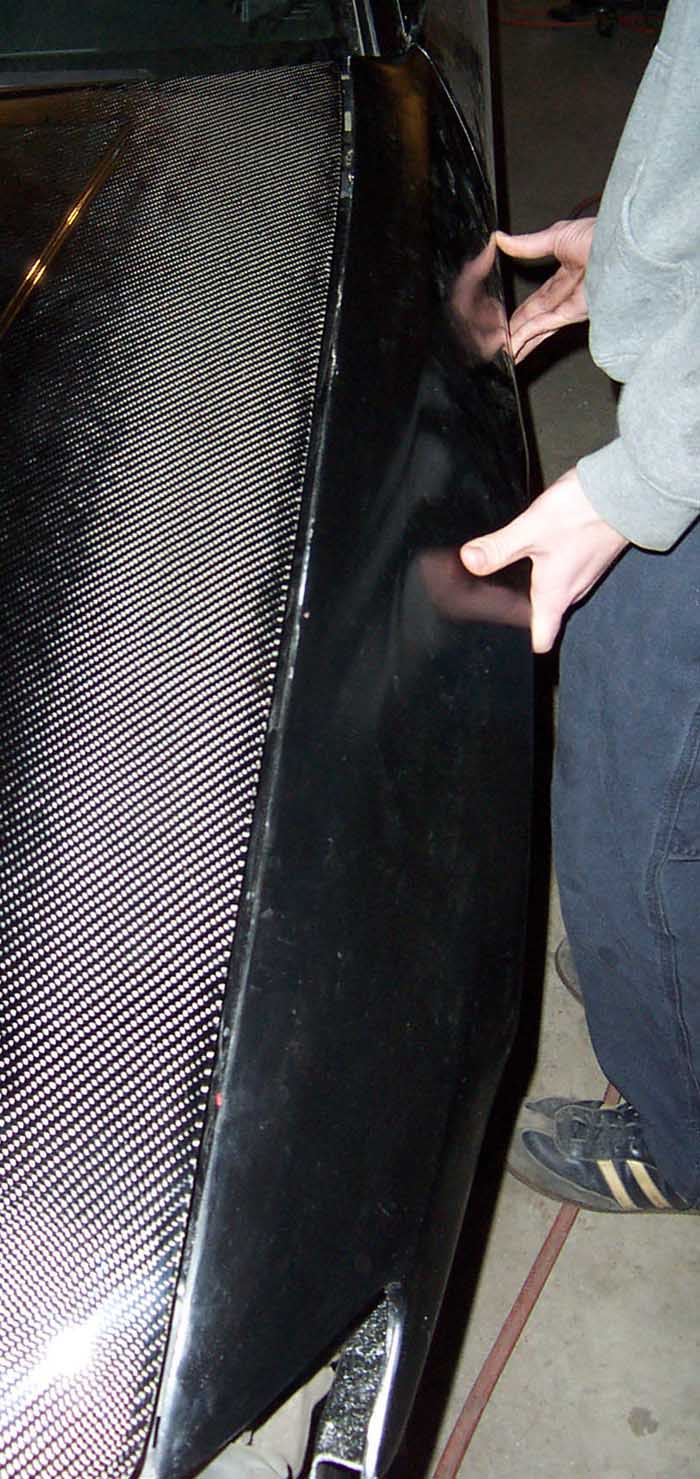
The fender is also far too low to line up with the hood. My first thought was to lower the hood latch mount so that the hood would sit lower and thus line up better with the fenders. This was a no-go. The hood's quality is impressive, especially for a VIS product. The fit and finish is spot-on. The hood could not be lowered, as it fit PERFECTLY as it was. It could not be lowered without scraping the radiator support. For the driver's side, the fender must be raised about a 1/2" and somehow shoved closer by about 3/4".... did you people with the VIS/GTP/RaceOn fenders have this issue? or is it slightly different? At this point, i'm wondering if I should have stuck with the MUCH cheaper lower grade products, as they were less than half the cost of the Inner Circle fenders. *sigh* moving on...
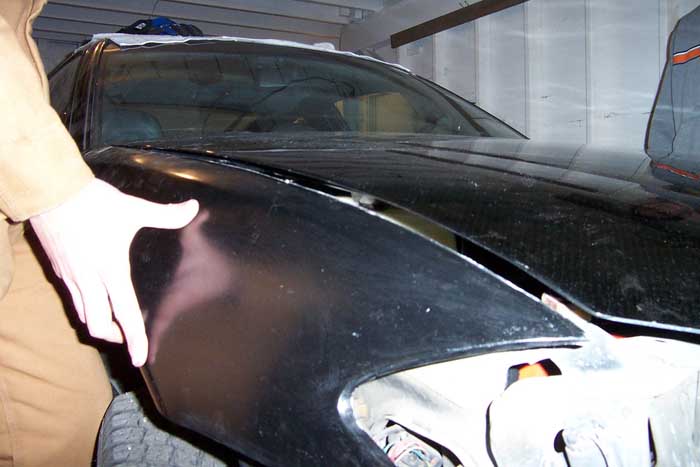
The passenger's side seemed to line up a little better. The gapping between the fender and the hood was excellent, however in the pic, you can see that hood gap top-to-bottom again... *sigh* this will be much work, the heat gun is going to get quite the workout. Rather than be depressed abouth the poor fender fitment, I elected to start installing the headlights... ie. the core support gets the sawzall treatment! Pix of that tomorrow... hopefull with mounted lights! Stay tuned!
^ TOP