Please sign my guestbook!
Sign My Guestbook  View My Guestbook
***DISCLAIMER***
(it's so pathetic that I have to do this; I HATE people that can't take responsibility for their own actions!)
This is ONLY documentation for my own project car. Should anyone decide to copy, emulate, or in any other way reproduce my ideas and/or methods, I bear NO RESPONSIBILITY for your actions. This is not a snap-tite model. There are no (quality) pre-fab kits out there that make it an easy 1-2-3 to do this conversion. This is custom work, and as such, is every bit as much art as it is science. Please ALWAYS think through what you're going to do before taking action, and PLEASE, Safety First!
Day 5 - Defeating headlight gap, Neatening up core support cuts, & Hacking off the passenger headlight mount
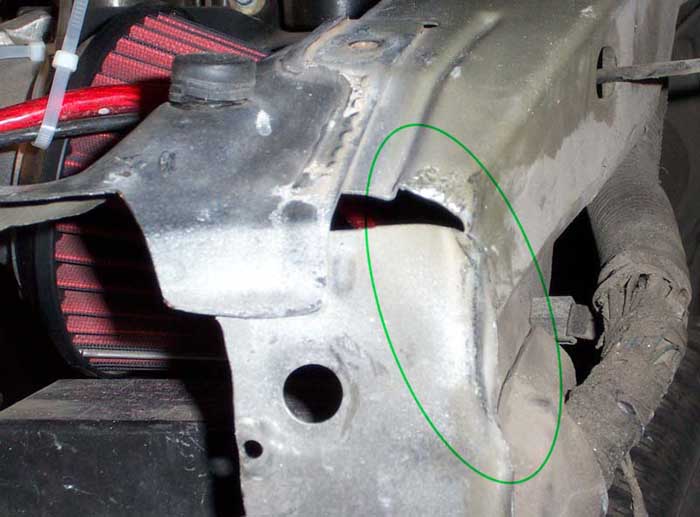
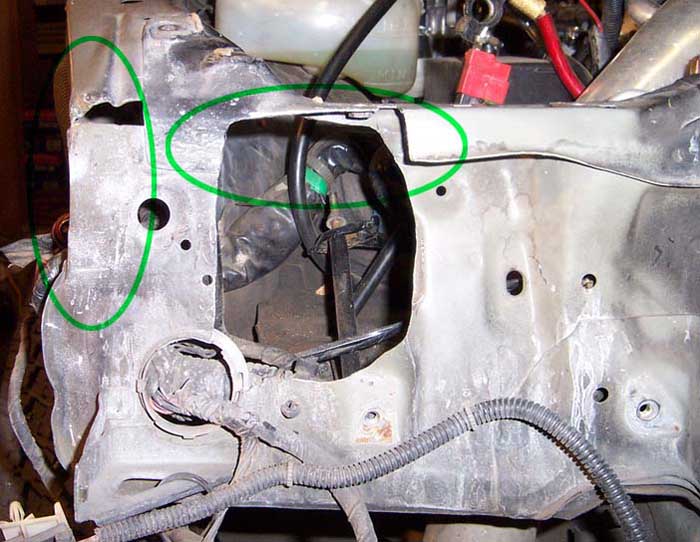
So from Day 3, you can see that the headlight gap was an issue, but didn't SEEM like a big deal. As it turns out, the corner spot welds where the radiator core support was attached to the frame got in the way of the headlight assembly's curvature, not a big deal, a little more pounding... BUT, additionally, the forward most parts of the frame (fender mounts) were 1/4" too high. You have no idea what frustration is until one piece of metal (well, per side), a mere 1/4" high, is stopping you from a whole slew of things. 5 mins with a small sledge hammer fixed that, note below the slight pounding takin to the very tip of the frame (no worries, it's nowhere near enough to degrade structural integrity in any way). The pic is a little misleading, the lighting and dirt on the frame itself makes it look like it's fairly well dented in the upper right area of the highlighted area, but I assure you it's not:
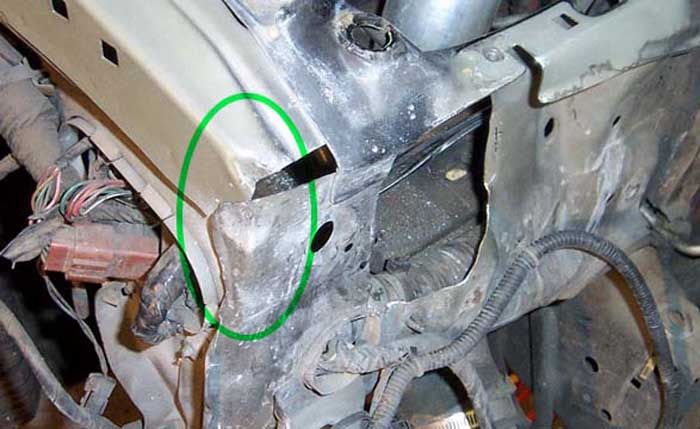
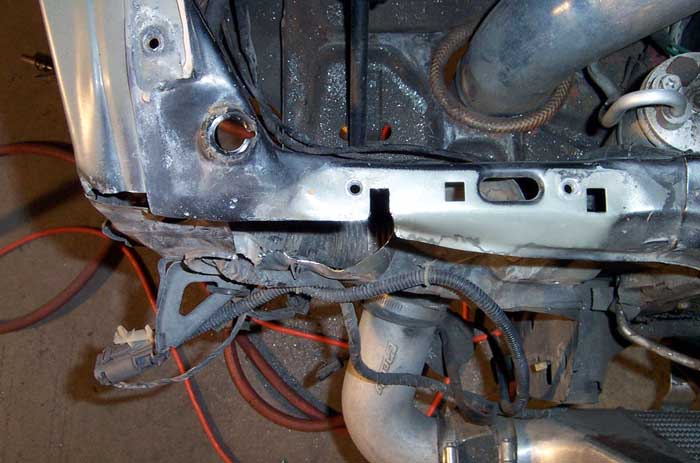
Here's the same work on the opposite side:
In this pic you can see the finished cutout area of the driver's side, the pics can't quite show you the details, but my friend Bob neatened it up with his sawzall/die grinder skills... he's much more experienced than myself, and it shows!
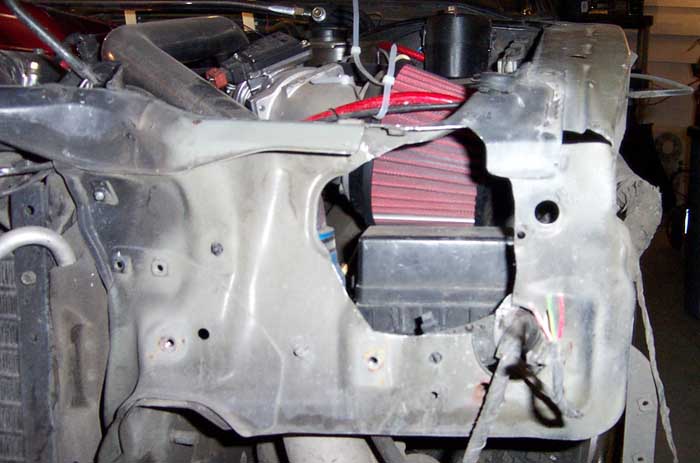
Top view of above:
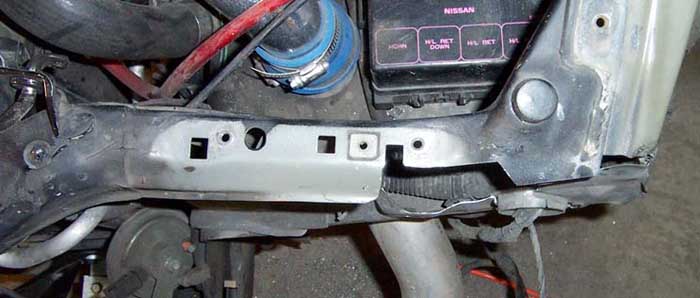
...and here's the passenger's side, completed. Note the sawzall skills of Bob again... I think I would've zipped right thru the upper area completely. I tend to get a lil out of control with the sawzall.... i've also noticed that when i'm zipping thru sheet metal I get this evil grin and maniacal laughter as I knowingly saw through anything in my path... maybe i should get myself checked for that... anyways, highlighted here are the hammered down areas of the frame and radiator support tab (left), and the most difficult cut of the support in the middle.
Top view of above:
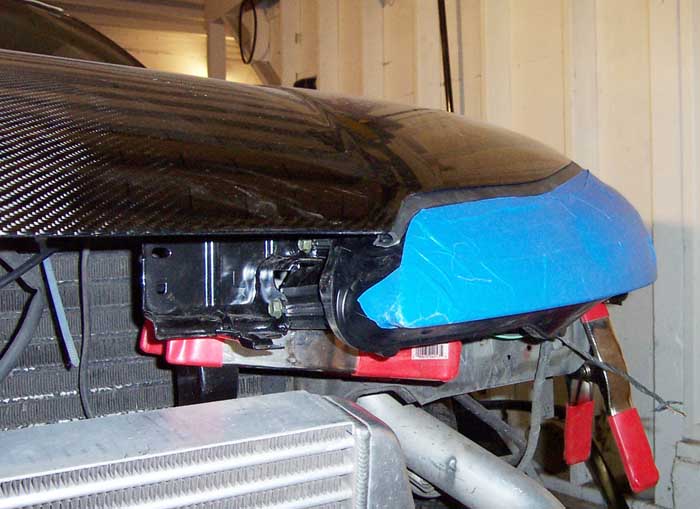
Ah! Now things are looking better! This most recent test fit made my night, smiley smiley Yoshi :)
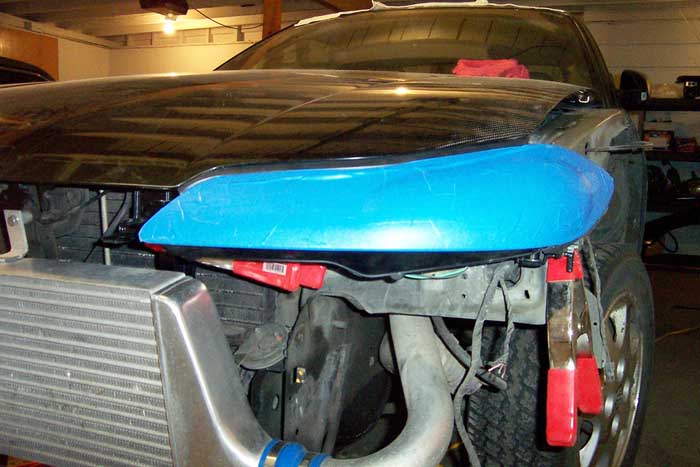
Awww jeah.... buttah! Let's hope that the light patterns are fairly close to squared up! Eyeballing it, it seems really close to accurate. Next, perma-mounting the lights!
below is a a pic of how I had to cut the passenger's side inner headlight mount... one of my AC lines was in the way. It's a custom setup tho, so this probably won't affect anyone choosing to follow in my footsteps.
Pic Pending
^ TOP